This tutorial will take you through the process of building your first dapp---an adoption tracking system for a pet shop!
This tutorial is meant for those with a basic knowledge of Ethereum and smart contracts, who have some knowledge of HTML and JavaScript, but who are new to dapps.
Note: For Ethereum basics, please read the Truffle Ethereum Overview tutorial before proceeding.
In this tutorial we will be covering:
- Setting up the development environment
- Creating a Truffle project using a Truffle Box
- Writing the smart contract
- Compiling and migrating the smart contract
- Testing the smart contract
- Creating a user interface to interact with the smart contract
- Interacting with the dapp in a browser
Background
Pete Scandlon of Pete's Pet Shop is interested in using Ethereum as an efficient way to handle their pet adoptions. The store has space for 16 pets at a given time, and they already have a database of pets. As an initial proof of concept, Pete wants to see a dapp which associates an Ethereum address with a pet to be adopted.
The website structure and styling will be supplied. Our job is to write the smart contract and front-end logic for its usage.
Setting up the development environment
There are a few technical requirements before we start. Please install the following:
- Node.js v6+ LTS and npm (comes with Node)
- Git
Once we have those installed, we only need one command to install Truffle:
npm install -g truffle
To verify that Truffle is installed properly, type truffle version on a terminal. If you see an error, make sure that your npm modules are added to your path.
We also will be using Ganache, a personal blockchain for Ethereum development you can use to deploy contracts, develop applications, and run tests. You can download Ganache by navigating to http://truffleframework.com/ganache and clicking the "Download" button.
Note: If you are developing in an environment without a graphical interface, you can also use Truffle Develop, Truffle's built-in personal blockchain, instead of Ganache. You will need to change some settings---such as the port the blockchain runs on---to adapt the tutorial for Truffle Develop.
Creating a Truffle project using a Truffle Box
Truffle initializes in the current directory, so first create a directory in your development folder of choice and then moving inside it.
mkdir pet-shop-tutorial

cd pet-shop-tutorial
We've created a special Truffle Box just for this tutorial called
pet-shop, which includes the basic project structure as well as code for the user interface. Use thetruffle unboxcommand to unpack this Truffle Box.truffle unbox pet-shop
Note: Truffle can be initialized a few different ways. Another useful initialization command is truffle init, which creates an empty Truffle project with no example contracts included. For more information, please see the documentation on Creating a project.
Directory structure
The default Truffle directory structure contains the following:
contracts/: Contains the Solidity source files for our smart contracts. There is an important contract in here calledMigrations.sol, which we'll talk about later.migrations/: Truffle uses a migration system to handle smart contract deployments. A migration is an additional special smart contract that keeps track of changes.test/: Contains both JavaScript and Solidity tests for our smart contractstruffle.js: Truffle configuration file
The pet-shop Truffle Box has extra files and folders in it, but we won't worry about those just yet.
Writing the smart contract
We'll start our dapp by writing the smart contract that acts as the back-end logic and storage.
Create a new file named
Adoption.solin thecontracts/directory.Add the following content to the file:
pragma solidity ^0.5.0;

contract Adoption {

}
Things to notice:
- The minimum version of Solidity required is noted at the top of the contract:
pragma solidity ^0.5.0;. Thepragmacommand means "additional information that only the compiler cares about", while the caret symbol (^) means "the version indicated or higher". - Like JavaScript or PHP, statements are terminated with semicolons.
Variable setup
Solidity is a statically-typed language, meaning data types like strings, integers, and arrays must be defined. Solidity has a unique type called an address. Addresses are Ethereum addresses, stored as 20 byte values. Every account and smart contract on the Ethereum blockchain has an address and can send and receive Ether to and from this address.
Add the following variable on the next line after
contract Adoption {.address[16] public adopters;
Things to notice:
We've defined a single variable:
adopters. This is an array of Ethereum addresses. Arrays contain one type and can have a fixed or variable length. In this case the type isaddressand the length is16.You'll also notice
adoptersis public. Public variables have automatic getter methods, but in the case of arrays a key is required and will only return a single value. Later, we'll write a function to return the whole array for use in our UI.
Your first function: Adopting a pet
Let's allow users to make adoption requests.
Add the following function to the smart contract after the variable declaration we set up above.
// Adopting a pet
function adopt(uint petId) public returns (uint) {
  require(petId >= 0 && petId <= 15);

  adopters[petId] = msg.sender;

  return petId;
}
Things to notice:
In Solidity the types of both the function parameters and output must be specified. In this case we'll be taking in a
petId(integer) and returning an integer.We are checking to make sure
petIdis in range of ouradoptersarray. Arrays in Solidity are indexed from 0, so the ID value will need to be between 0 and 15. We use therequire()statement to ensure the ID is within range.If the ID is in range, we then add the address that made the call to our
adoptersarray. The address of the person or smart contract who called this function is denoted bymsg.sender.Finally, we return the
petIdprovided as a confirmation.
Your second function: Retrieving the adopters
As mentioned above, array getters return only a single value from a given key. Our UI needs to update all pet adoption statuses, but making 16 API calls is not ideal. So our next step is to write a function to return the entire array.
Add the following
getAdopters()function to the smart contract, after theadopt()function we added above:// Retrieving the adopters function getAdopters() public view returns (address[16] memory) { return adopters; }Things to notice:
Since
adoptersis already declared, we can simply return it. Be sure to specify the return type (in this case, the type foradopters) asaddress[16] memory.memorygives the data location for the variable.The
viewkeyword in the function declaration means that the function will not modify the state of the contract. Further information about the exact limits imposed by view is available here.
Compiling and migrating the smart contract
Now that we have written our smart contract, the next steps are to compile and migrate it.
Truffle has a built-in developer console, which we call Truffle Develop, which generates a development blockchain that we can use to test deploy contracts. It also has the ability to run Truffle commands directly from the console. We will use Truffle Develop to perform most of the actions on our contract in this tutorial.
Compilation
Solidity is a compiled language, meaning we need to compile our Solidity to bytecode for the Ethereum Virtual Machine (EVM) to execute. Think of it as translating our human-readable Solidity into something the EVM understands.
In a terminal, make sure you are in the root of the directory that contains the dapp and type:
truffle compileNote: If you're on Windows and encountering problems running this command, please see the documentation on resolving naming conflicts on Windows.
You should see output similar to the following:
Compiling ./contracts/Migrations.sol...
Compiling ./contracts/Adoption.sol...
Writing artifacts to ./build/contracts
Migration
Now that we've successfully compiled our contracts, it's time to migrate them to the blockchain!
A migration is a deployment script meant to alter the state of your application's contracts, moving it from one state to the next. For the first migration, you might just be deploying new code, but over time, other migrations might move data around or replace a contract with a new one.
Note: Read more about migrations in the Truffle documentation.
You'll see one JavaScript file already in the migrations/ directory: 1_initial_migration.js. This handles deploying the Migrations.sol contract to observe subsequent smart contract migrations, and ensures we don't double-migrate unchanged contracts in the future.
Now we are ready to create our own migration script.
Create a new file named
2_deploy_contracts.jsin themigrations/directory.Add the following content to the
2_deploy_contracts.jsfile:var Adoption = artifacts.require("Adoption"); module.exports = function(deployer) { deployer.deploy(Adoption); };Before we can migrate our contract to the blockchain, we need to have a blockchain running. For this tutorial, we're going to use Ganache, a personal blockchain for Ethereum development you can use to deploy contracts, develop applications, and run tests. If you haven't already, download Ganache and double click the icon to launch the application. This will generate a blockchain running locally on port 7545.
Note: Read more about Ganache in the Truffle documentation.
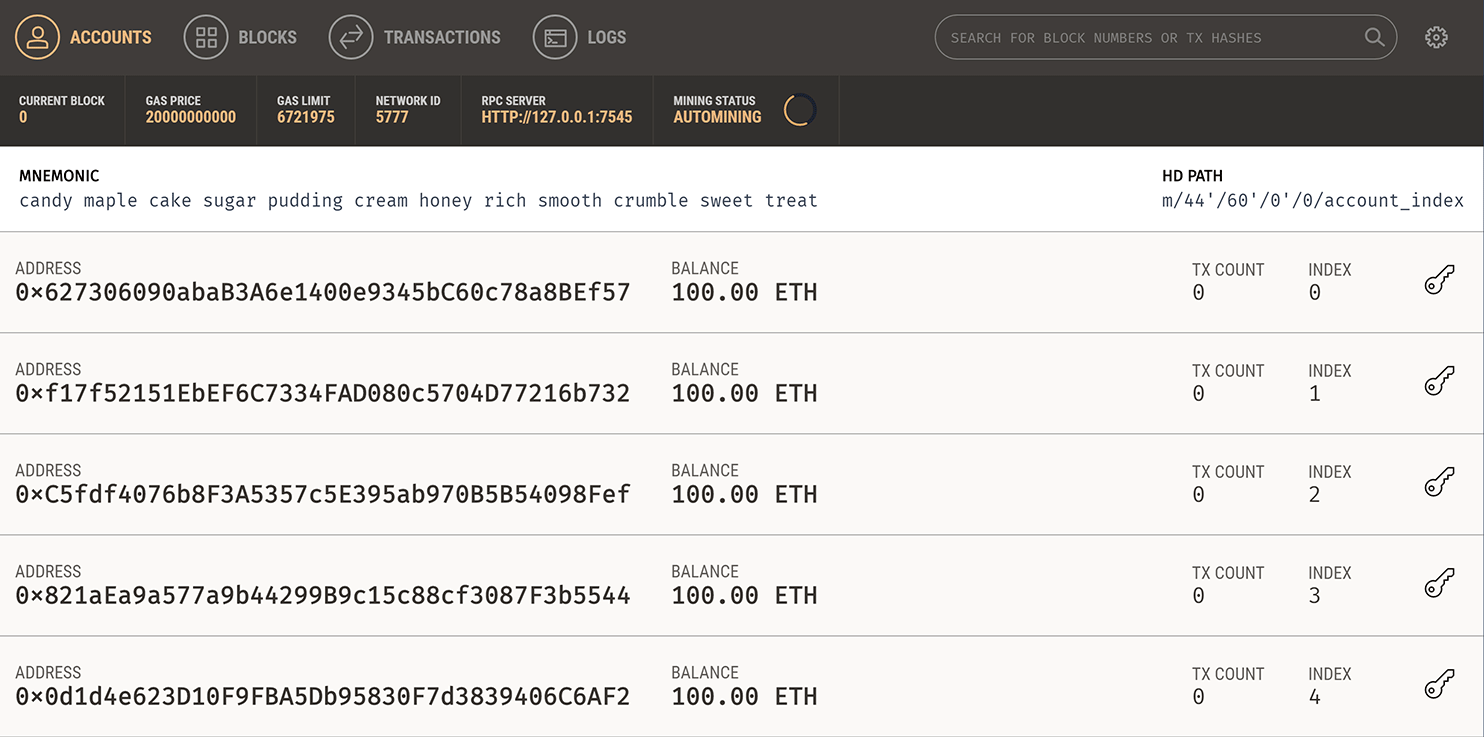
Ganache on first launch
Back in our terminal, migrate the contract to the blockchain.
truffle migrateYou should see output similar to the following:
  1_initial_migration.js
  ======================

     Deploying 'Migrations'
     ----------------------
     > transaction hash:    0x3b558e9cdf1231d8ffb3445cb2f9fb01de9d0363e0b97a17f9517da318c2e5af
     > Blocks: 0            Seconds: 0
     > contract address:    0x5ccb4dc04600cffA8a67197d5b644ae71856aEE4
     > account:             0x8d9606F90B6CA5D856A9f0867a82a645e2DfFf37
     > balance:             99.99430184
     > gas used:            284908
     > gas price:           20 gwei
     > value sent:          0 ETH
     > total cost:          0.00569816 ETH


     > Saving migration to chain.
     > Saving artifacts
     -------------------------------------
     > Total cost:          0.00569816 ETH


  2_deploy_contracts.js
  =====================

     Deploying 'Adoption'
     .............................
     .............................
You can see the migrations being executed in order, followed by some information related to each migration. (Your information will differ.)
In Ganache, note that the state of the blockchain has changed. The blockchain now shows that the current block, previously
0, is now4. In addition, while the first account originally had 100 ether, it is now lower, due to the transaction costs of migration. We'll talk more about transaction costs later.
Ganache after migration
You've now written your first smart contract and deployed it to a locally running blockchain. It's time to interact with our smart contract now to make sure it does what we want.
Testing the smart contract
Truffle is very flexible when it comes to smart contract testing, in that tests can be written either in JavaScript or Solidity. In this tutorial, we'll be writing our tests in Solidity.
Create a new file named
TestAdoption.solin thetest/directory.Add the following content to the
TestAdoption.solfile:pragma solidity ^0.5.0; import "truffle/Assert.sol"; import "truffle/DeployedAddresses.sol"; import "../contracts/Adoption.sol"; contract TestAdoption { // The address of the adoption contract to be tested Adoption adoption = Adoption(DeployedAddresses.Adoption()); // The id of the pet that will be used for testing uint expectedPetId = 8; //The expected owner of adopted pet is this contract address expectedAdopter = address(this); }
We start the contract off with 3 imports:
Assert.sol: Gives us various assertions to use in our tests. In testing, an assertion checks for things like equality, inequality or emptiness to return a pass/fail from our test. Here's a full list of the assertions included with Truffle.DeployedAddresses.sol: When running tests, Truffle will deploy a fresh instance of the contract being tested to the blockchain. This smart contract gets the address of the deployed contract.Adoption.sol: The smart contract we want to test.
Note: The first two imports are referring to global Truffle files, not a truffle directory. You should not see a truffle directory inside your test/ directory.
Then we define three contract-wide variables:
- First, one containing the smart contract to be tested, calling the
DeployedAddressessmart contract to get its address. - Second, the id of the pet that will be used to test the adoption functions.
- Third, since the TestAdoption contract will be sending the transaction, we set the expected adopter address to this, a contract-wide variable that gets the current contract's address.
Testing the adopt() function
To test the adopt() function, recall that upon success it returns the given petId. We can ensure an ID was returned and that it's correct by comparing the return value of adopt() to the ID we passed in.
Add the following function within the
TestAdoption.solsmart contract, after the declaration ofAdoption:// Testing the adopt() function function testUserCanAdoptPet() public { uint returnedId = adoption.adopt(expectedPetId); Assert.equal(returnedId, expectedPetId, "Adoption of the expected pet should match what is returned."); }
Things to notice:
- We call the smart contract we declared earlier with the ID of
expectedPetId. - Finally, we pass the actual value, the expected value and a failure message (which gets printed to the console if the test does not pass) to
Assert.equal().
Testing retrieval of a single pet's owner
Remembering from above that public variables have automatic getter methods, we can retrieve the address stored by our adoption test above. Stored data will persist for the duration of our tests, so our adoption of pet expectedPetId above can be retrieved by other tests.
Add this function below the previously added function in
TestAdoption.sol.// Testing retrieval of a single pet's owner function testGetAdopterAddressByPetId() public { address adopter = adoption.adopters(expectedPetId); Assert.equal(adopter, expectedAdopter, "Owner of the expected pet should be this contract"); }
After getting the adopter address stored by the adoption contract, we assert equality as we did above.
Testing retrieval of all pet owners
Since arrays can only return a single value given a single key, we create our own getter for the entire array.
Add this function below the previously added function in
TestAdoption.sol.// Testing retrieval of all pet owners function testGetAdopterAddressByPetIdInArray() public { // Store adopters in memory rather than contract's storage address[16] memory adopters = adoption.getAdopters(); Assert.equal(adopters[expectedPetId], expectedAdopter, "Owner of the expected pet should be this contract"); }
Note the memory attribute on adopters. The memory attribute tells Solidity to temporarily store the value in memory, rather than saving it to the contract's storage. Since adopters is an array, and we know from the first adoption test that we adopted pet expectedPetId, we compare the testing contracts address with location expectedPetId in the array.
Running the tests
Back in the terminal, run the tests:
truffle testIf all the tests pass, you'll see console output similar to this:
   Using network 'development'.

   Compiling ./contracts/Adoption.sol...
   Compiling ./test/TestAdoption.sol...
   Compiling truffle/Assert.sol...
   Compiling truffle/DeployedAddresses.sol...

     TestAdoption
       ✓ testUserCanAdoptPet (91ms)
       ✓ testGetAdopterAddressByPetId (70ms)
       ✓ testGetAdopterAddressByPetIdInArray (89ms)


     3 passing (670ms)
Creating a user interface to interact with the smart contract
Now that we've created the smart contract, deployed it to our local test blockchain and confirmed we can interact with it via the console, it's time to create a UI so that Pete has something to use for his pet shop!
Included with the pet-shop Truffle Box was code for the app's front-end. That code exists within the src/ directory.
The front-end doesn't use a build system (webpack, grunt, etc.) to be as easy as possible to get started. The structure of the app is already there; we'll be filling in the functions which are unique to Ethereum. This way, you can take this knowledge and apply it to your own front-end development.
Instantiating web3
Open
/src/js/app.jsin a text editor.Examine the file. Note that there is a global
Appobject to manage our application, load in the pet data ininit()and then call the functioninitWeb3(). The web3 JavaScript library interacts with the Ethereum blockchain. It can retrieve user accounts, send transactions, interact with smart contracts, and more.Remove the multi-line comment from within
initWeb3and replace it with the following:// Modern dapp browsers... if (window.ethereum) { App.web3Provider = window.ethereum; try { // Request account access await window.ethereum.enable(); } catch (error) { // User denied account access... console.error("User denied account access") } } // Legacy dapp browsers... else if (window.web3) { App.web3Provider = window.web3.currentProvider; } // If no injected web3 instance is detected, fall back to Ganache else { App.web3Provider = new Web3.providers.HttpProvider('http://localhost:7545'); } web3 = new Web3(App.web3Provider);
Things to notice:
First, we check if we are using modern dapp browsers or the more recent versions of MetaMask where an
ethereumprovider is injected into thewindowobject. If so, we use it to create our web3 object, but we also need to explicitly request access to the accounts withethereum.enable().If the
ethereumobject does not exist, we then check for an injectedweb3instance. If it exists, this indicates that we are using an older dapp browser (like Mist or an older version of MetaMask). If so, we get its provider and use it to create our web3 object.If no injected web3 instance is present, we create our web3 object based on our local provider. (This fallback is fine for development environments, but insecure and not suitable for production.)
Instantiating the contract
Now that we can interact with Ethereum via web3, we need to instantiate our smart contract so web3 knows where to find it and how it works. Truffle has a library to help with this called truffle-contract. It keeps information about the contract in sync with migrations, so you don't need to change the contract's deployed address manually.
Still in
/src/js/app.js, remove the multi-line comment from withininitContractand replace it with the following:$.getJSON('Adoption.json', function(data) { // Get the necessary contract artifact file and instantiate it with truffle-contract var AdoptionArtifact = data; App.contracts.Adoption = TruffleContract(AdoptionArtifact); // Set the provider for our contract App.contracts.Adoption.setProvider(App.web3Provider); // Use our contract to retrieve and mark the adopted pets return App.markAdopted(); });
Things to notice:
We first retrieve the artifact file for our smart contract. Artifacts are information about our contract such as its deployed address and Application Binary Interface (ABI). The ABI is a JavaScript object defining how to interact with the contract including its variables, functions and their parameters.
Once we have the artifacts in our callback, we pass them to
TruffleContract(). This creates an instance of the contract we can interact with.With our contract instantiated, we set its web3 provider using the
App.web3Providervalue we stored earlier when setting up web3.We then call the app's
markAdopted()function in case any pets are already adopted from a previous visit. We've encapsulated this in a separate function since we'll need to update the UI any time we make a change to the smart contract's data.
Getting The Adopted Pets and Updating The UI
Still in
/src/js/app.js, remove the multi-line comment frommarkAdoptedand replace it with the following:var adoptionInstance; App.contracts.Adoption.deployed().then(function(instance) { adoptionInstance = instance; return adoptionInstance.getAdopters.call(); }).then(function(adopters) { for (i = 0; i < adopters.length; i++) { if (adopters[i] !== '0x0000000000000000000000000000000000000000') { $('.panel-pet').eq(i).find('button').text('Success').attr('disabled', true); } } }).catch(function(err) { console.log(err.message); });
Things to notice:
We access the deployed
Adoptioncontract, then callgetAdopters()on that instance.We first declare the variable
adoptionInstanceoutside of the smart contract calls so we can access the instance after initially retrieving it.Using call() allows us to read data from the blockchain without having to send a full transaction, meaning we won't have to spend any ether.
After calling
getAdopters(), we then loop through all of them, checking to see if an address is stored for each pet. Since the array contains address types, Ethereum initializes the array with 16 empty addresses. This is why we check for an empty address string rather than null or other falsey value.Once a
petIdwith a corresponding address is found, we disable its adopt button and change the button text to "Success", so the user gets some feedback.Any errors are logged to the console.
Handling the adopt() Function
Still in
/src/js/app.js, remove the multi-line comment fromhandleAdoptand replace it with the following:var adoptionInstance; web3.eth.getAccounts(function(error, accounts) { if (error) { console.log(error); } var account = accounts[0]; App.contracts.Adoption.deployed().then(function(instance) { adoptionInstance = instance; // Execute adopt as a transaction by sending account return adoptionInstance.adopt(petId, {from: account}); }).then(function(result) { return App.markAdopted(); }).catch(function(err) { console.log(err.message); }); });
Things to notice:
We use web3 to get the user's accounts. In the callback after an error check, we then select the first account.
From there, we get the deployed contract as we did above and store the instance in
adoptionInstance. This time though, we're going to send a transaction instead of a call. Transactions require a "from" address and have an associated cost. This cost, paid in ether, is called gas. The gas cost is the fee for performing computation and/or storing data in a smart contract. We send the transaction by executing theadopt()function with both the pet's ID and an object containing the account address, which we stored earlier inaccount.The result of sending a transaction is the transaction object. If there are no errors, we proceed to call our
markAdopted()function to sync the UI with our newly stored data.
Interacting with the dapp in a browser
Now we're ready to use our dapp!
Installing and configuring MetaMask
The easiest way to interact with our dapp in a browser is through MetaMask, a browser extension for both Chrome and Firefox.
Install MetaMask in your browser.
Once installed, you'll see the MetaMask fox icon next to your address bar. Click the icon and you'll see this screen appear:
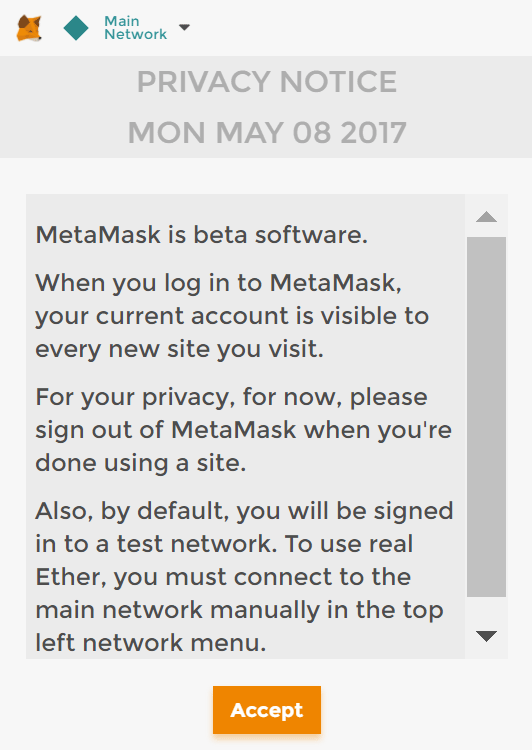
Privacy Notice
Click Accept to accept the Privacy Notice.
Then you'll see the Terms of Use. Read them, scrolling to the bottom, and then click Accept there too.
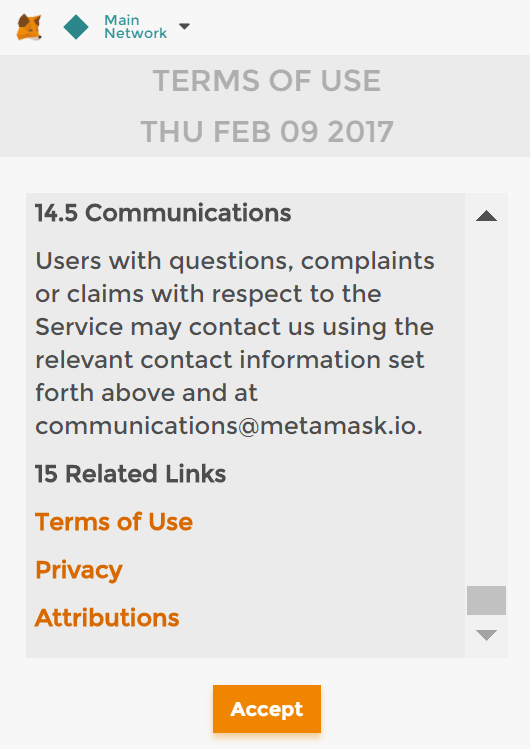
Terms of Use
Now you'll see the initial MetaMask screen. Click Import Existing DEN.
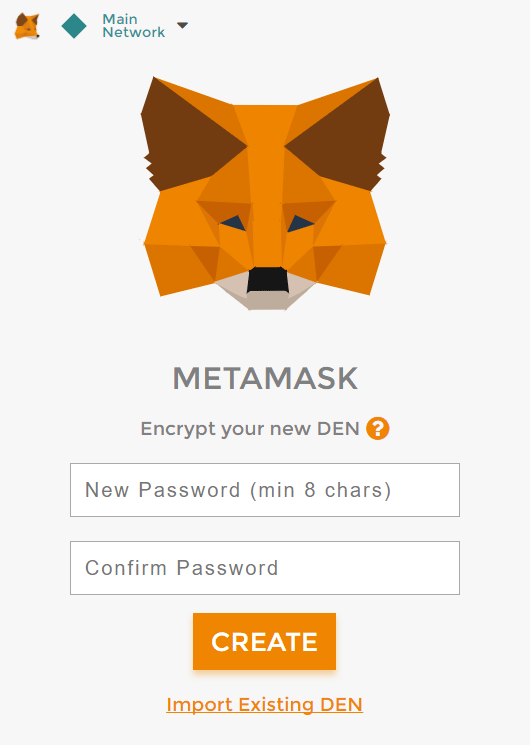
MetaMask initial screen
In the box marked Wallet Seed, enter the mnemonic that is displayed in Ganache.
Warning: Do not use this mnemonic on the main Ethereum network (mainnet). If you send ETH to any account generated from this mnemonic, you will lose it all!
Enter a password below that and click OK.
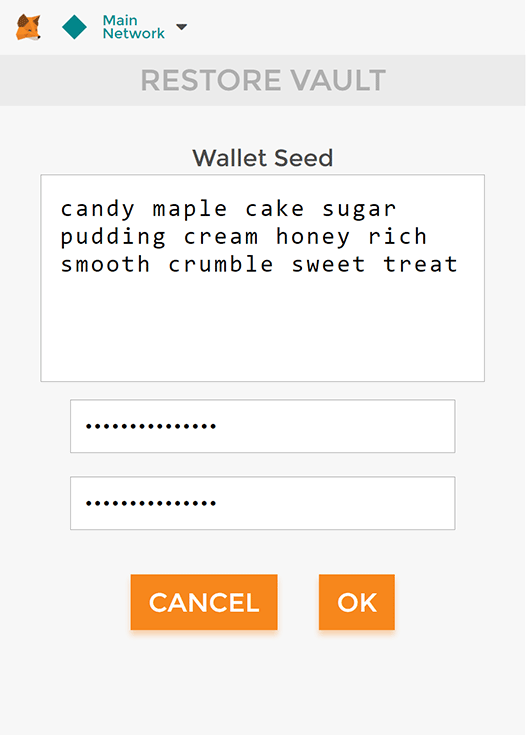
MetaMask seed phrase
Now we need to connect MetaMask to the blockchain created by Ganache. Click the menu that shows "Main Network" and select Custom RPC.
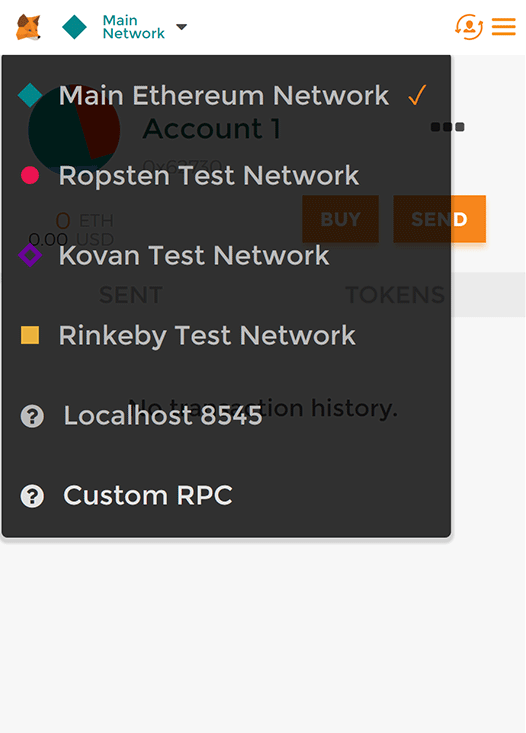
MetaMask network menu
In the box titled "New RPC URL" enter
http://127.0.0.1:7545and click Save.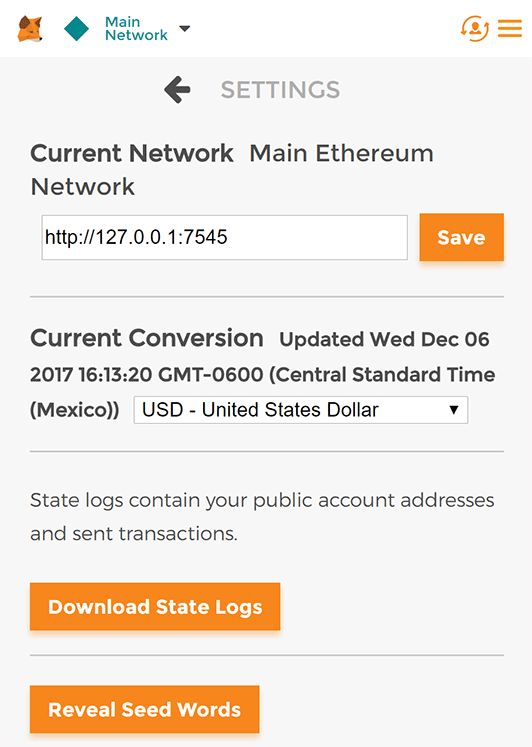
MetaMask Custom RPC
The network name at the top will switch to say "Private Network".
Click the left-pointing arrow next to "Settings" to close out of the page and return to the Accounts page.
Each account created by Ganache is given 100 ether. You'll notice it's slightly less on the first account because some gas was used when the contract itself was deployed and when the tests were run.
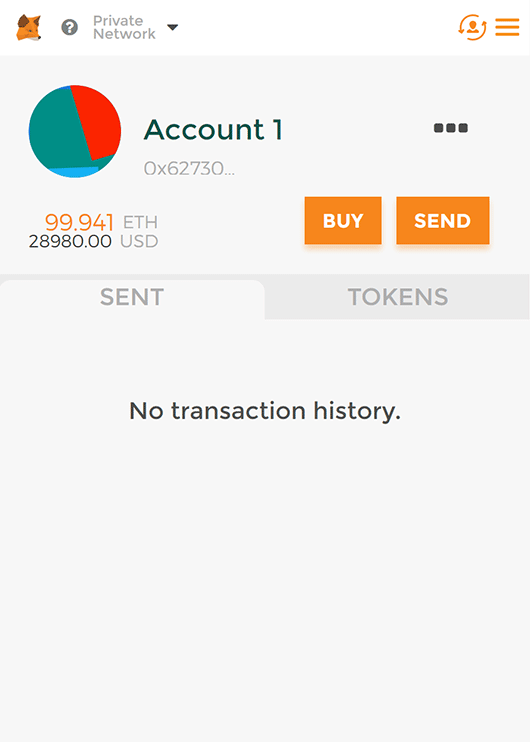
MetaMask account configured
Configuration is now complete.
Installing and configuring lite-server
We can now start a local web server and use the dapp. We're using the lite-server library to serve our static files. This shipped with the pet-shop Truffle Box, but let's take a look at how it works.
Open
bs-config.jsonin a text editor (in the project's root directory) and examine the contents:{ "server": { "baseDir": ["./src", "./build/contracts"] } }This tells
lite-serverwhich files to include in our base directory. We add the./srcdirectory for our website files and./build/contractsdirectory for the contract artifacts.We've also added a
devcommand to thescriptsobject in thepackage.jsonfile in the project's root directory. Thescriptsobject allows us to alias console commands to a single npm command. In this case we're just doing a single command, but it's possible to have more complex configurations. Here's what yours should look like:"scripts": { "dev": "lite-server", "test": "echo \"Error: no test specified\" && exit 1" },This tells npm to run our local install of
lite-serverwhen we executenpm run devfrom the console.
Using the dapp
Start the local web server:
npm run devThe dev server will launch and automatically open a new browser tab containing your dapp.
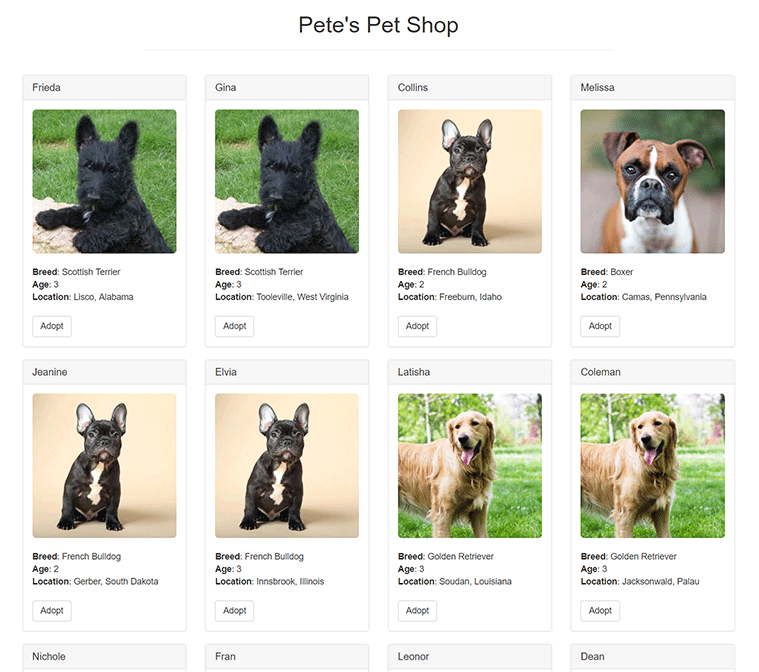
Pete's Pet Shop
To use the dapp, click the Adopt button on the pet of your choice.
You'll be automatically prompted to approve the transaction by MetaMask. Click Submit to approve the transaction.
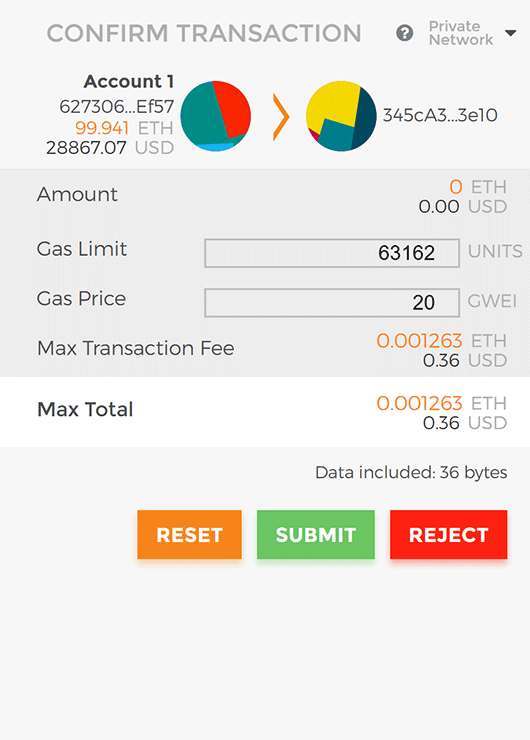
Adoption transaction review
You'll see the button next to the adopted pet change to say "Success" and become disabled, just as we specified, because the pet has now been adopted.
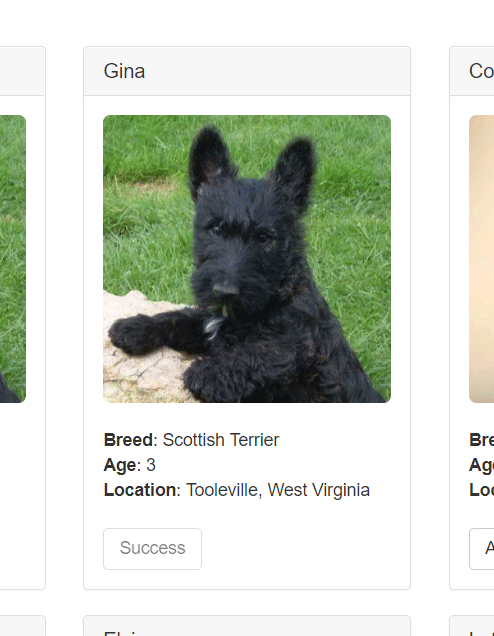
Adoption success
Note: If the button doesn't automatically change to say "Success", refreshing the app in the browser should trigger it.
And in MetaMask, you'll see the transaction listed:
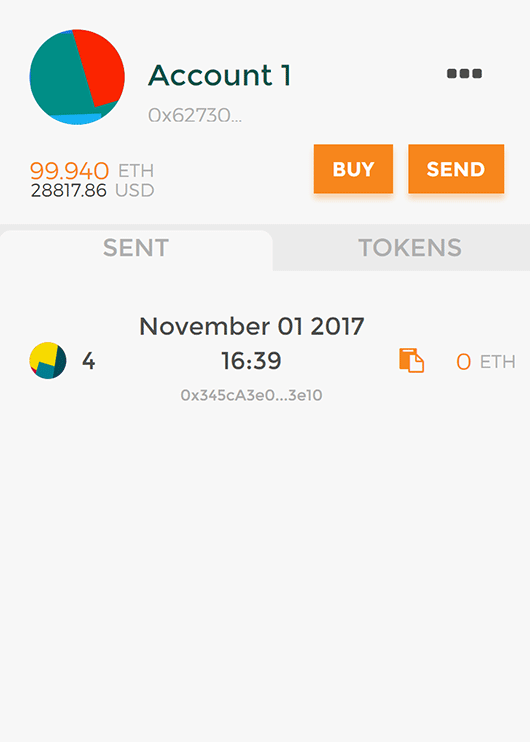
MetaMask transaction
You'll also see the same transaction listed in Ganache under the "Transactions" section.
Congratulations! You have taken a huge step to becoming a full-fledged dapp developer. For developing locally, you have all the tools you need to start making more advanced dapps. If you'd like to make your dapp live for others to use, stay tuned for our future tutorial on deploying to the Ropsten testnet.